Create Arc on Seam
You can use the Create Arc on Seam tool. when you want to reshape a segment on a seam in the shape of an arc. This can be useful, for example if you need to create a slit seam and you want to reshape the seam.
There are two keyboard keys you can use with the Arc on Seam tool: Alt and Shift.
Alt: Allows you to add a point to define where you want the arc to start.
Shift: Allows you to change the center point location of the arc.
Icon & Location
-

-
Toolbar: Insert
-
Toolbox: Seam
To use the Create Arc on Seam tool:
Open up your pattern.
Add your seams.
Select
the Arc on Seam tool
Notice an Arc icon appears.
Select the base point on the sew line.
While
holding down your mouse, drag to the first grading point
Or
If you want to define the exact location:
Press
Alt on your keyboard while dragging.
The Move Point dialog appears allowing
you to define the exact location of the point: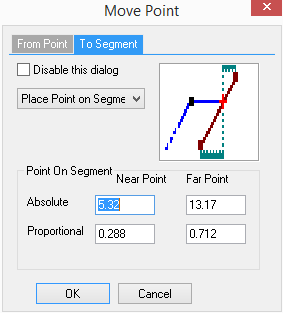
Enter the exact location where you want the first point then click Ok.
While
holding down your mouse, drag to the second point where you are creating
the arc on the seam line.
Or
If you want to define the exact location:
Press
Alt on your keyboard while dragging.
The Move Point dialog appears allowing
you to define the exact location of the point:
Enter the exact location where you want the second point then click Ok.
Once
both points are selected, drag with your mouse to increase the curve of
the arc as follows: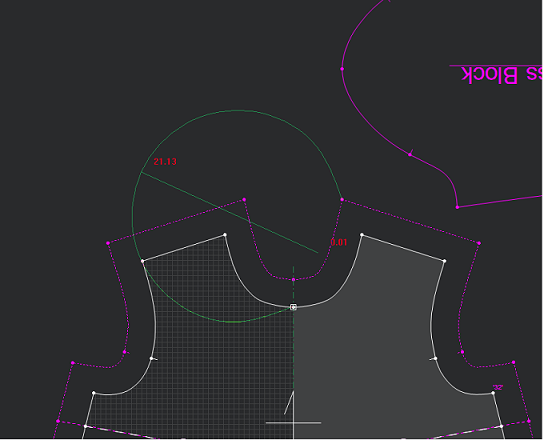
To change the center point of the arc, press Shift on your keyboard.
Let
go of your mouse wen you reach the end of the arc top.
The Create Arc dialog appears: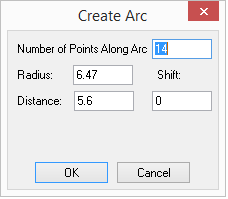
In the Number of Points Along Arc field, enter the number of non-grading points that will support the arc.
In
the Radius field, enter the radius
of the arc in centimeters. Note:
If you are using the Shift key
on your keyboard, you can see the value in the Shift
field.
Note:
If you are using the Shift key
on your keyboard, you can see the value in the Shift
field.
In the Distance field, enter the distance from the middle of the selected segment.
Click Ok when you are done.
 See also:Toolbox Seam Tools