Change Global Pleats Attributes
You can use the Change Pleats Attributes tool when you want to change the attributes of all the pleats in your pattern. For example, you can make all your pleats as dashed lines, as I-Notch, etc.
The dialog is dynamic according to the pleats you have in your pattern, according to the selection you make in the dialog and according to the attributes that are defined inside your pattern.
It's important to remember if you make a change, but the system does not find anything that meets the criteria, then nothing will be changed.
The attributes you are changing are according to the pleat attributes as they are defined in your pattern:
To use the Change Pleat Attributes tool:
Go
to Piece > General > Change Pleats
Attributes:
The Change Global Pleats dialog
is displayed:
In the Pieces area, define how you want to search for pleats and where to apply the changes:
All: You want to search and apply changes to pleats in all pieces that are inside the pattern.
On Working Area: You want to search and apply changes to pleats that are only displayed in the Working Area.
All Selected Pieces: You can want to search and apply changes to all pieces that you selected (you can select multiple pieces with the selection rectangle).
Current Only: You want to search and apply changes only to the pleats that are in the selected piece.
Now define the changes you want to make to the pleats.
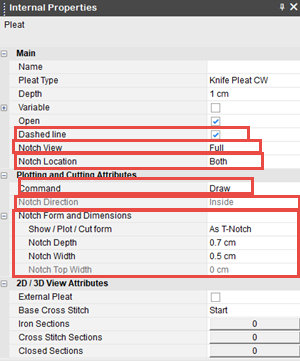
In the Lines area, define the type of line:
Dashed line: Displays the pleats as dashed lines.
Notch line: Displays the pleats as notched lines.
No Change: If you want to leave the pleat lines as they are.
In the Command area, define the type of cut/plot command:
Draw: Applies a draw command for the pleat (for Marker).
Split: Applies a split command for the pleat (for Marker).
None: If you do not want the pleats to have a cut/plot command.
No Change: If you want to leave the cut/plot command as is.
In the Notch Form area, define the type of notch form:
As I Notch: Indicates the notch form appears as an I notch.
As T Notch: Indicates the notch form appears as a T notch.
As V Notch: Indicates the notch form appears as a V notch.
As Box Notch: Indicates the notch form appears as a box notch.
No Change: If you want to leave the notch form as is.
In the Notch Location area, define the location of the notch:
Both: Indicates the notches appear both at the top and bottom of the pleat.
Start: Indicates the notches appear at the top of the pleat.
End: Indicates the notches appear at the bottom of the pleat.
No Change: If you want to leave the notch location as is.
In the Notch View area, define how the notch appears:
Full: Indicates the notch appears along the full length of the pleat.
Side: Indicates the notch appears to the side of the pleat.
Center: Indicates the notch appears in the center of the pleat.
No Change: If you want to leave the notch view as is.
In the Notch
Dimensions area, define the dimension of the depth and width of
the notch:
Note:
This field is dynamic according to the notch type; therefore not all options
are available. For example, if the notch type is I-Notch, Top Width
is disabled.
Depth: Indicates the depth of the notch.
Width: Indicates the width of the notch.
Top Width: Indicates the top width of the notch.
None: If you do not want the notch to have dimensions.
No Change: If you want to leave the notch dimensions as they are.
In the Notch Direction area, define the direction of the notch:
Inside: Indicates the notch appears on the inside of the piece.
Outside: Indicates the notch appears
on the outside of the piece.
Note:
I and T notches can only appear on the inside of the piece; therefore
if the notch is I notch or T notch, the outside option appears greyed
out.
No Change: If you want to leave the notch direction as is.
Click Set when you want to apply the changes.
Click Close to close the dialog.