Arrange For Plot
You can use the Arrange for Plot option, when you want to arrange and spread the pieces currently in the piece list on the Working Area. The pieces will be nested and ready for plotting. Before placing the pieces on the Working Area, use the Arrange for Plot dialog to set the plotter and nesting definitions, and to select the pieces you want to arrange.
-
Arrange on Board arranges only the pieces currently on the Working Area for plotting with a standard gap.
-
Arrange on Board with Large Shift arranges only the pieces currently on the Working Area for plotting with a large gap.
-
Arrange for Plot arranges all pieces in the file for plotting with a standard gap.
-
Arrange two Overlapped Pieces parts and spreads overlapped pieces, two at a time.
Icon & Location
-
Menu: File > Arrange for Plot
-
Toolbar: General
To arrange for plot:
-
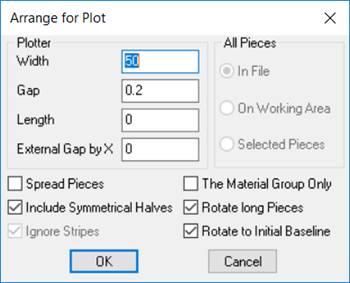
From the main menu, go to File > Arrange For Plot.
-
In the Width field, enter the width of the paper you are using. If the width of the layout is greater than the width of the paper you are using, the print-out is divided into frames.
-
In the Gap field, define the required gap between the pieces.
-
In the Length field, enter the length of the paper you are using. If the paper you are using is shorter than the total length of the layout, the print-out is divided into frames.
-
In the External Gap by X field, enter the gap between the frames if the length of the paper is less than the total length of the layout and / or if the layout is wider than the width of the paper.
-
Select the option for which pieces you are arranging: All pieces in the file, only those in the Working Area, or only selected pieces.
-
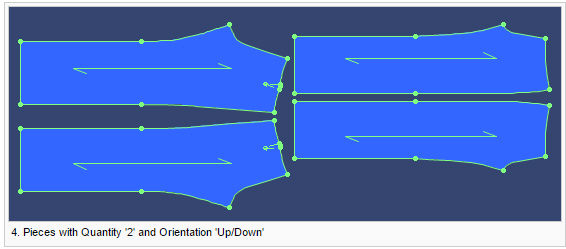
Select the Spread Pieces checkbox, to scatter pieces according to their Quantities per Set, Orientation and Opposite Piece while arranging them on the Working Area for plotting:
-
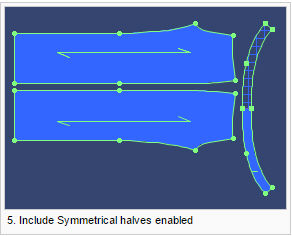
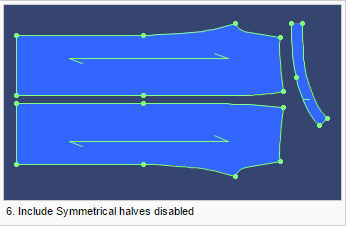
Select the Include Symmetrical Halves checkbox, if you want to arrange a half piece, including its symmetrical half.
-
Select the Material Group Only checkbox, if you want to arrange only those pieces which are of the same material as the current piece.
-
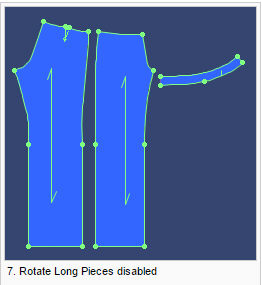
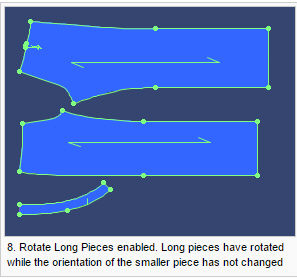
Select the Rotate Long Piece checkbox, if you are arranging pieces which are longer than the paper's width. The pieces will rotate regardless of their baseline to avoid framing of pieces. In the following example the paper's width is 90 cm and two of the pieces are much longer.
-
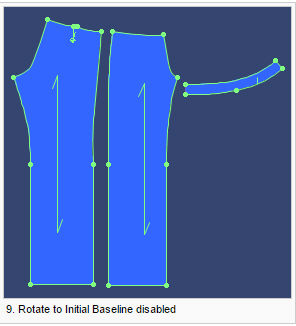
Select the Rotate to Initial Baseline checkbox, if you want to nest pieces according to their baseline.
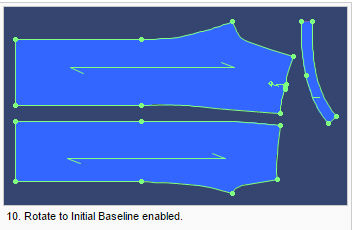
-
Click OK when you are done.
 See also: Plotting