How to Move Files and Folders
You can move files or folder between locations using the Move dialog, or by dragging and dropping. You will have to have appropriate permissions on both the original location and the destination to be able to move items.
 Note: If you are a member of more than one company, you will not be
able to move items between companies, Move only works between location
inside the same company.
Note: If you are a member of more than one company, you will not be
able to move items between companies, Move only works between location
inside the same company.
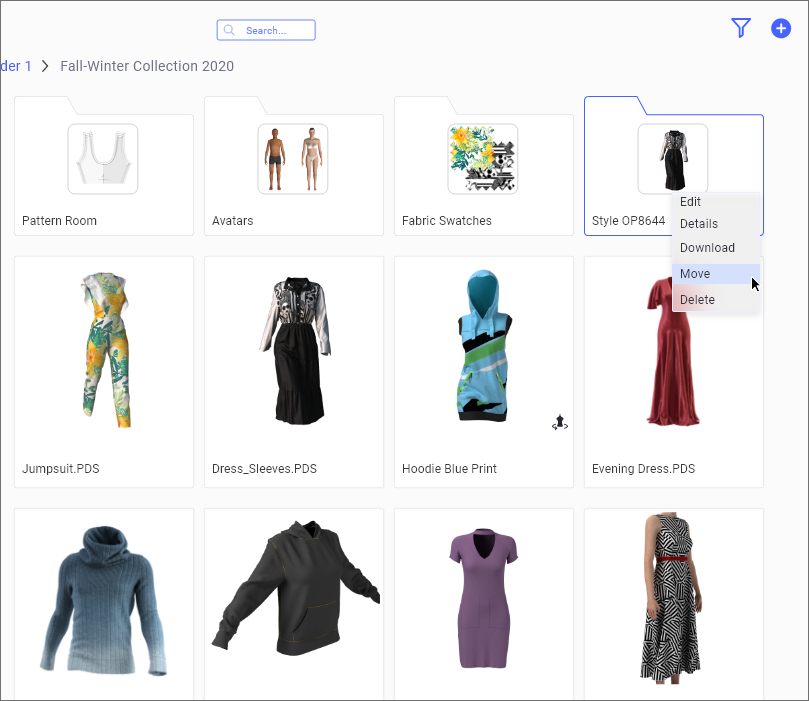
To Move an item- select it and click using the right-mouse button, then select Move from the menu
When the Move dialog will open, you will see the list of the Workspaces that were shared with you in the current company. You can expand the list to view folders inside each workspace.
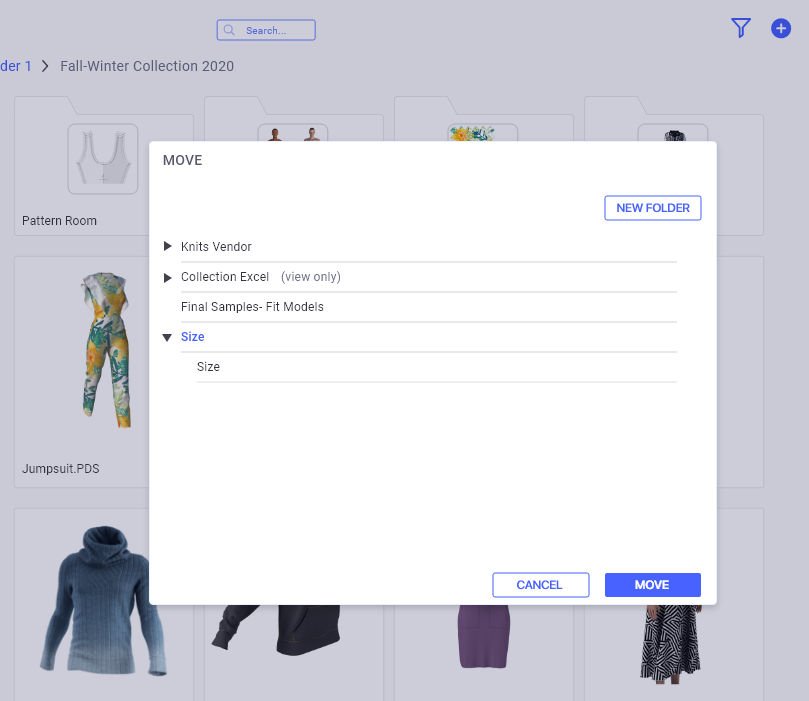
Select the location by clicking on its name. In case you have Viewer permissions on a specific Workspace, we will display a label next to it and you will not be able to select it or any of the folders inside it.
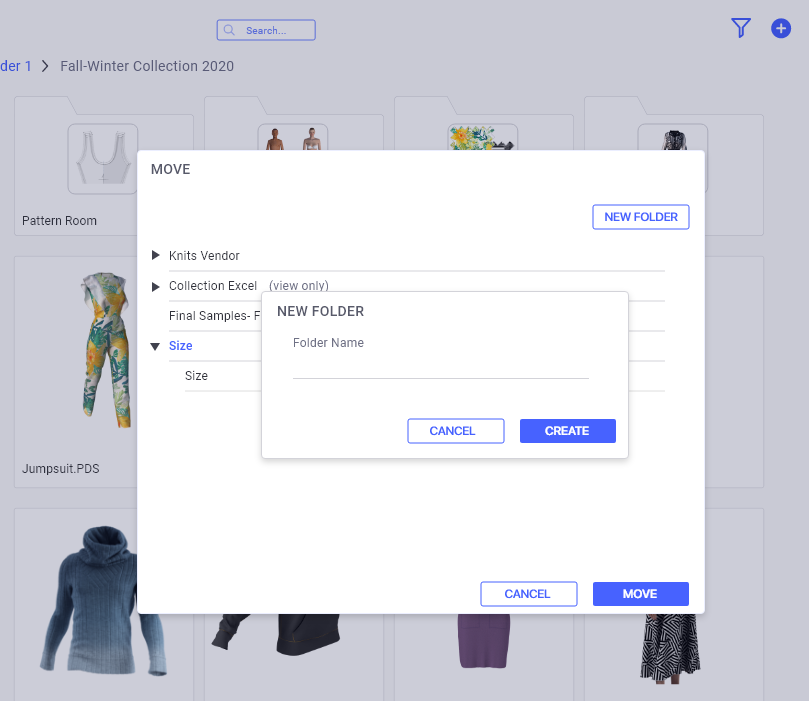
Create Folder
You can use the Create Folder button to create a new folder inside a Workspace if you need to.
First select the Workspace, and then click on Create Folder button. You will have to enter the folder name and create it. Later you can use the Edit Folder dialog to add thumbnail or other details
Once you have selected the new location for the file, click on Move button. The item will move immediately to its new location
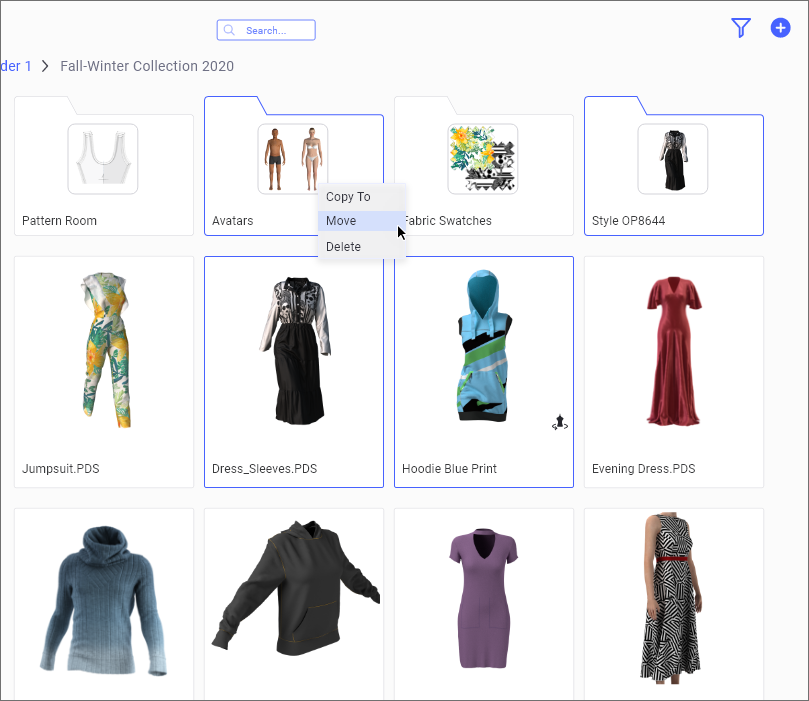
Move Multiple Items
Use the Shift or CTRL keys to select multiple files and folders to move them all to the same location.
After you selected the relevant files and folders, click on the right mouse button to open the contextual menu
Note:
-
You can also move any files and/or folders by dragging and dropping .
-
This can be done inside work areas.
-
You can also move a selection of files and /or folders (use the Shift and / or Control convention to select more that one item).
 See also: How to Manage My Content