Split Piece
The Split Piece option allows you to split a piece into two or more parts, in order to improve efficiency of the marker table.
This option is only available if a split line was created in the PDS (via a pleat and the command: SPLIT).
You can apply the split manually via Split Piece, or automatically when using Auto Nesting.
Icon & Location
-
Menu: Piece >Split Piece
To use the Split Piece option:
-
Open a PDS file that contains a split piece. (either MRK file or via Open Style Files Order).
-
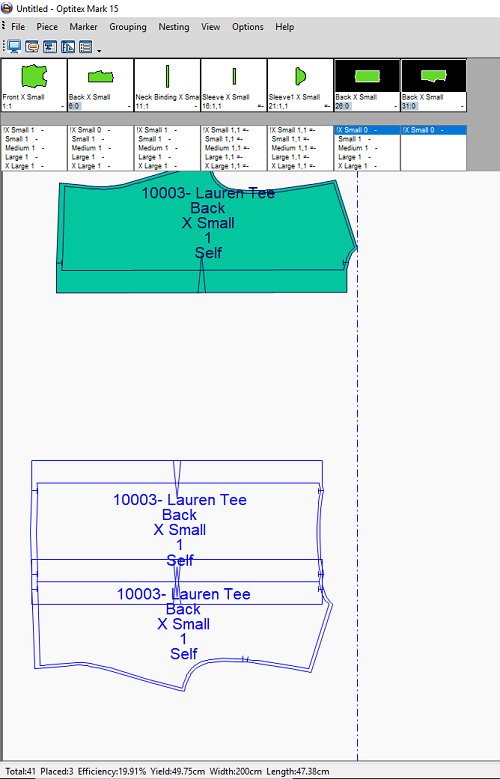
Select the piece.
In this example we selected the Back piece. -
From the main menu, go to Piece> Split Piece.
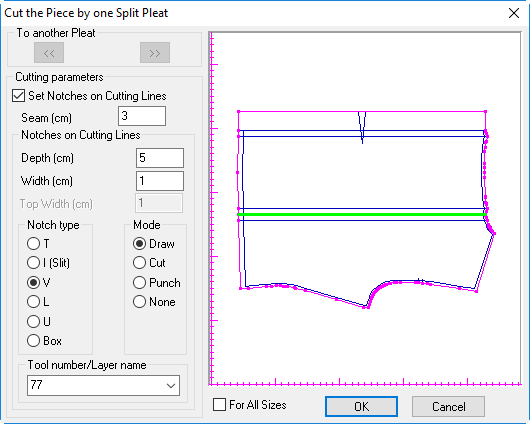
The Cut Piece by One Split Pleat dialog appears: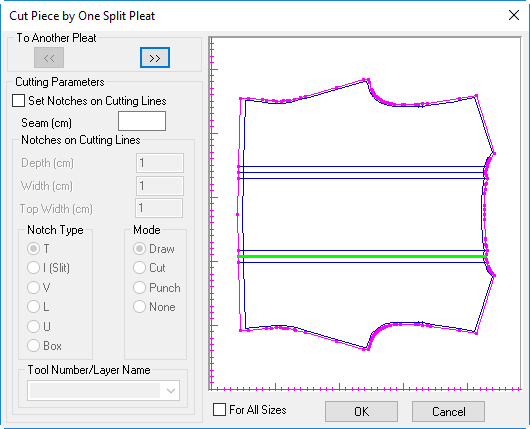
-
If your piece contains more than one pleat, you can use the left and right arrows to move to the next/previous pleat.
-
If you want to apply a seam to the split piece, in the Seam field, enter the size of the seam.
-
If you want to set a notch on the cut line (to indicate where the pieces are split), select the Set Notches on Cutting Lines checkbox.
-
If you want to define the depth/width of the notch, enter the required values in the Depth and Width fields.
-
In the Notch Type area, select the radio button of the type of notch (in the above example we selected V notch).
-
In the Mode area, select the radio button of the cut command.
-
If you want to define a layer, enter the layer name in the Layer Name field.
-
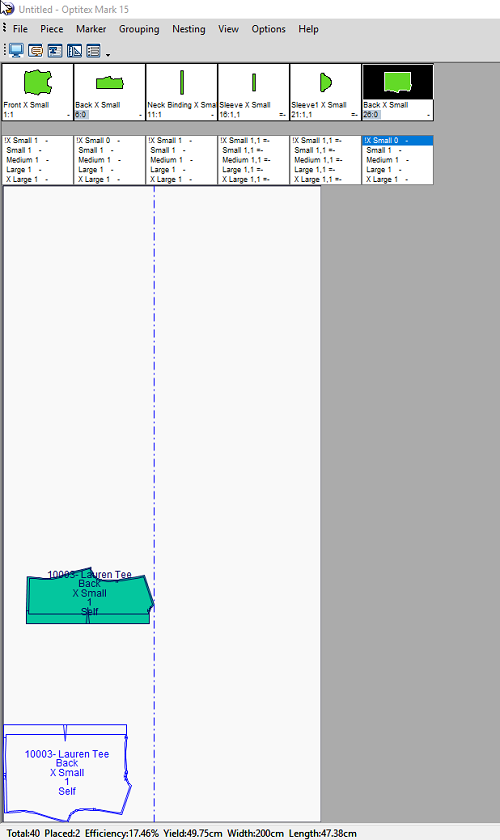
If you want to define the same split for all pieces in the same size, select the All Sizes checkbox. A new piece will be added as the split piece and the original piece will be removed from the Pieces Bar.
-
Click Ok to create the split piece.
In this example, a split piece for one size was created and you can see the V notch that appears in-between the split piece: