Split All Pieces
The Split All Pieces option allows you to split all pieces that contain split lines into two or more parts, in order to improve efficiency of the marker table.
This option is only available if a split line was created in the PDS (via a pleat and the command: SPLIT).
Icon & Location
-
Menu: Piece >Split All Pieces
To use the Split Piece option:
Open
a PDS file that contains split pieces. (either MRK file or via Open Style
Files Order).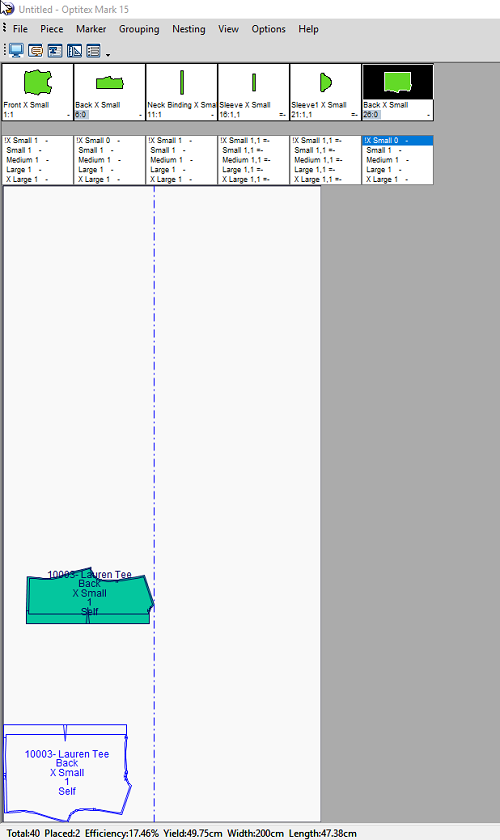
From
the main menu, go to Piece > Split
All Pieces.
The Cut all Pieces by its Split Pleats
dialog appears:
Select the Cut Selected Pieces Only checkbox, if you want to cut only those pieces that were selected prior to opening the dialog.
Select the Set Notches on Cutting Lines checkbox, if you want to set a notch on the cut line (to indicate where the pieces are split).
In the Notches on Cutting Lines area, define the attributes of the notch:
In the Notch Type area, select the radio button of the type of notch (in the above example we selected V notch).
In the Mode area, select the radio button of the cut command.
If you want to define the depth/width/Top Width (if the notch contains a top) of the notch, enter the required values in the Depth, Width and Top Width fields.
If you want to apply a seam to the split piece, in the Seam field, enter the size of the seam in centimeters.
If you want to define a layer, enter the layer name in the Layer Name field.
Click OK
to cut the pieces.
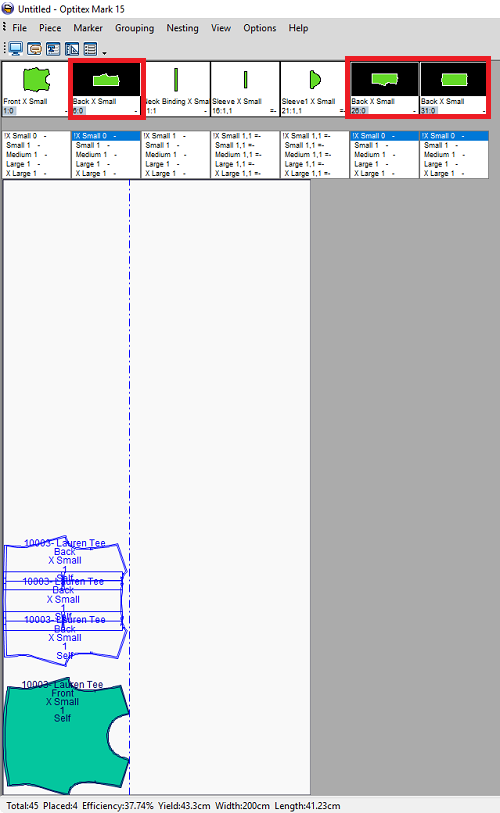
Notice the new pieces were added to the Pieces Bar and the old pieces were
removed from the original piece. as follows: