Splicing Report
Set the different values that control the way the Splicing Lines will be calculated.
Location
-
Menu: Marker > Calculations >Splicing Report
To use the Splicing Report:
From the main menu,
go to Marker > Calculations >Splicing
Report.
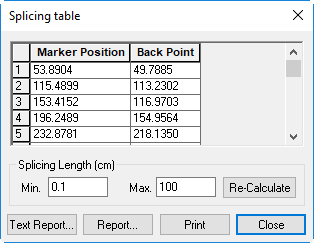
The Splicing Table dialog appears:
In the Splicing Length area, set the minimum and maximum values between two splice lines.
Click Re-Calculate, if you want to recalculate the splicing lines due to a change in the Marker.
Click Print, if you want to send the information to a printer.
Click Report, if you want to create an Excel report of the Splicing report.
Click Text
Report, if you want to create a TXT file with all the splicing
information.
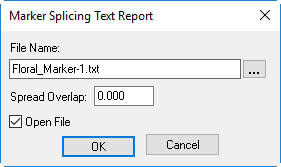
The Marker Splicing Text Report
dialog appears:
Enter a file name.
Click Browse to choose the location of the text file.
In the Spread Overlap field, enter a value to add to the lines coordinates.
If you want to open the file automatically after clicking Ok, select the Open File checkbox.
Click Ok when you are done.