Solution Report
You can use the Solution Report when you want to view the last three nesting results. You can view summarized properties of saved nestings, including marker length and width, efficiency, number of plies used by the nesting, etc.
Icon & Location
-
Menu: Nesting> Solution Report
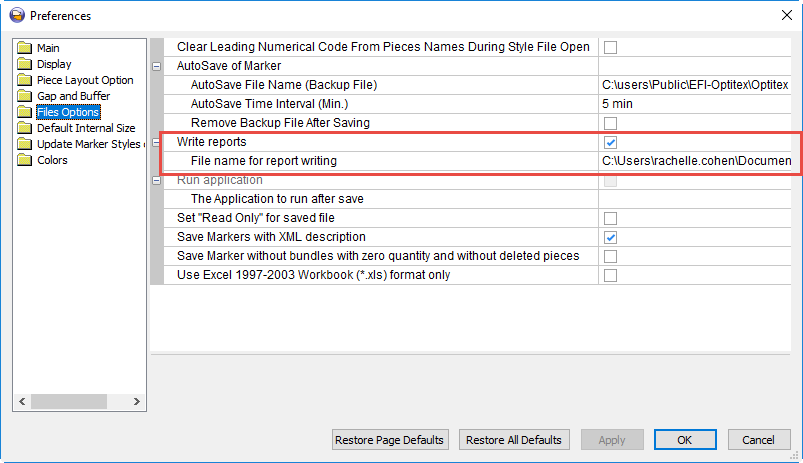
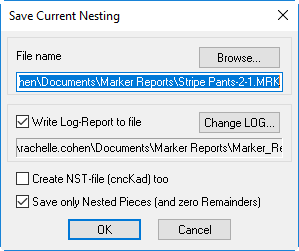
To enable the Solution Report you must do a few things.![]() Click here to see how to enable the
option.
Click here to see how to enable the
option.
To view the Solution Report
-
From the main menu, go to Nesting> Solution Report.
The Solution Report appears displaying the date of the last three saved nestings.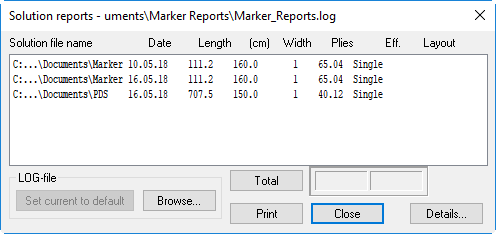
At the top of the dialog you can see the location where the log file is saved and all reports that are available in that defined location. -
View the information in the table as follows:
Column
Description
Solution File Name
Displays the file name and location of the saved nesting.
Date
Displays the date the file was created.
Length
Displays the marker length.
(cm)
Displays the marker length in centimeters.
Width
Displays the marker width.
Plies
Displays the number of plies used by the nesting.
Eff
Displays the total efficiency.
Layout
Displays the type of layout if available.
-
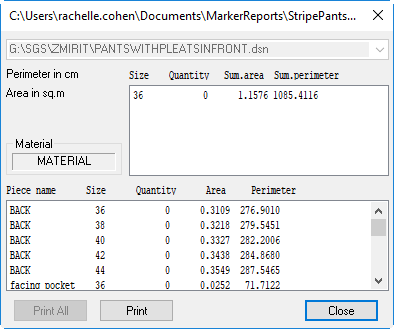
To view more details about a specific file, either double-click on the file name or click the Details button.
-
Click Total to view the total width and number of plies.
-
Click Print to send the information to the printer.
-
Click Browse, to select a different log file location.
-
Click Close to close the dialog.