Plot
Use the Plot command to Plot or Cut the displayed pieces. Files can be plotted on a plotting device connected directly to one of the serial or parallel ports on your machine or on any PC on the network.
Note: Optitex spoolers can't be plugged into the USB port, unless a Serial to USB converter is used.
Icon & Location
-

-
Menu: File> Plot
-
Toolbar: System Tools
To plot:
-
Select Plot from the File menu, or click the Plot icon on the toolbar.
The Plot dialog is displayed.
-
Select the desired plotting options.
-
Click OK.
Plot Dialog
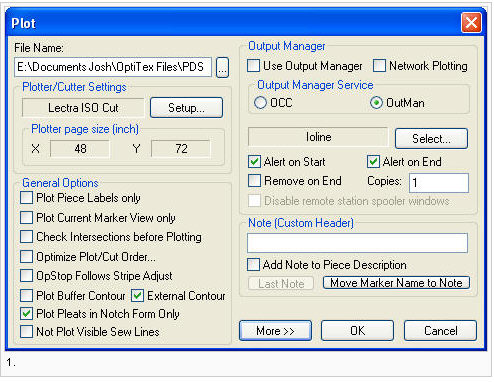
File Name
Set the plot file path. When using a Spooler the plot file path must be in the partition where the spooler is located.
Plotter/Cutter Setting
Click the Setup button to open the Plotter/Cutter Setup dialog.
Plotter Page Size
This field indicates the size of the plotting/cutting page.
-
Y - indicates the page width.
-
X - indicates the page length.
General Options
Plot Piece Labels Only
Plot only the pieces's decrpation without the piece outside contour or any other internals elements. Use for quick plotting of pieces names in order to place them on top of stack of pieces.
Plot Current marker View Only
Will plot only the active view of a marker. Use this option in order to plot only part of the marker. Use the Zoom Rectangle tool in order to enlarge the specific area you would like to plot and have this option check when plotting.
Check Intersections before Plotting
Will run the detect Intersection command prior sending the file to plot. In case that overlap is found a message will be displayed and the intersecting pieces will highlights.
Optimize Plot/Cut Order
Checking this box will display the Optimize Cut Order box parior for the cut/plot file creation. Use it only for cutters or pen plotters. Optimize Cut Order will automatically change the sequence of the pieces and how they cut in order to save idle time on the cutter. Also you can specified common lines ( sheared lines) for faster and more accurate cutting.
OpStop Follows Stripe Adjust
Will automatically add the OpStop command (M01) to notches that related to stripes. Also will add it to bump lines if displayed.
Plot Buffer Contour
Will plot the buffer around the pieces with the pieces contour
External Contour
Have this option checked at all time in order to plot the piece in the correct size.
Plot Pleats In Notch Form Only
Will plot I notches to mark pleat locations on the piece instead of the axe lines. Noteches will have drew attribute.
Not Plot Visible Sew Lines
Will not plot the seam allowance marks or any other internal lines that are set to SEW even if they shown on the marker table.
Output Manager
Optitex software uses two different spoolers: OCC and Outman. Both spoolers
support the RS232 protocol and the Gerber plotter (ACUUPLOT) protocol.
The Lectra E32 and E33 protocols, OptiJet printer protocol, LPT communication
(parallel) protocol and LAN (TCP/IP) printer protocol are supported only
by OCC.
-
To add an external Plot file to the Outman spooler queue, use the 'Qman' utility.
-
To add an external Plot file to the OCC spooler queue, an "OCC Queue" key module is required.
Alert On Start/ Hold
When the OCC spooler is used, this option is enabled for both
spoolers - OCC and Outman.
If you choose to work with OCC, then checking the Hold box sends your job
with the "Hold" attribute. You must then send the job manually
from the OCC software windows (unchecking the Hold box sends your job
directly to the output device).
If you choose to work with the Outman spooler, checking the Alert
on Start box displays a message in the Outman software windows asking
you to confirm sending the job:
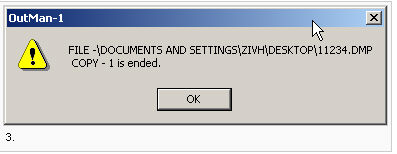
Alert On End
This option is available only when you use the Outman spooler.
Check Alert on End to display a message after sending the job in the Outman
software windows asking you to confirm that the job has been completed.
Remove On End
This option is available only when you
use the Outman spooler.
Check Remove on End to delete all the plotted files after sending the job.
Otherwise, they will remain on your computer.
Copies
This option is available for both spooler types. Enter the number of job plotting copies you need in the Copies box.
Disable Remote Station Spooler Windows
Available only for the OCC spooler. Check this box to hide the OCC software windows if your OCC queue is a Remote Queue.
Note (Custom Header)
Add any free text to the marker's header.