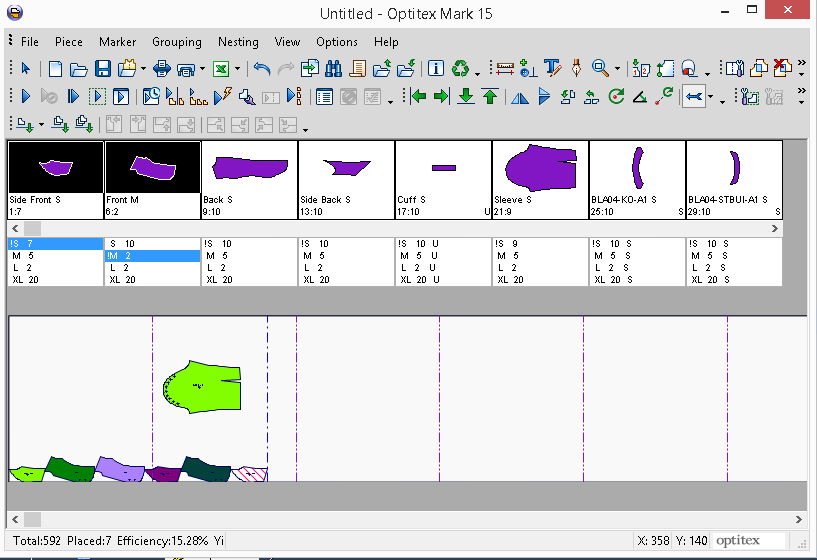
Placing Pieces on the Marker
Once you have created your Marker table and defined your style files, you can now place your pieces on the Marker table.
There are a few different ways to place pieces. You should chose the way that works best with your working method.
To place pieces on the Marker table:
-
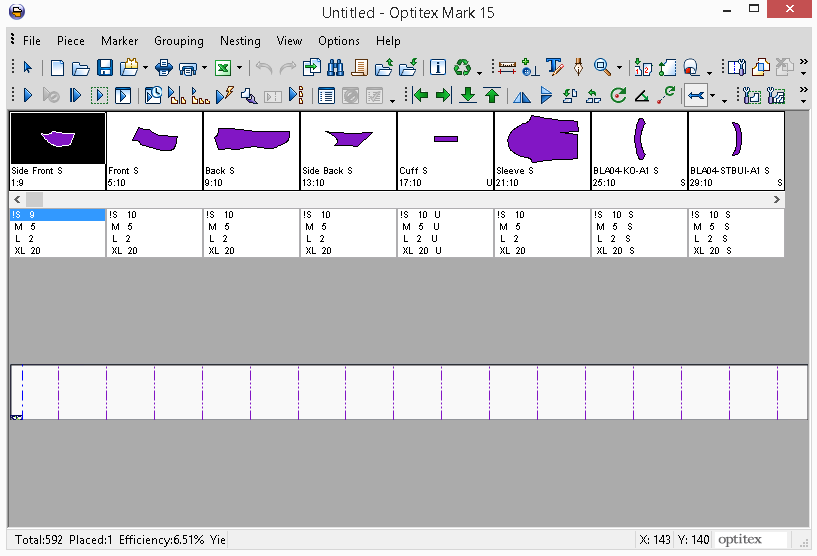
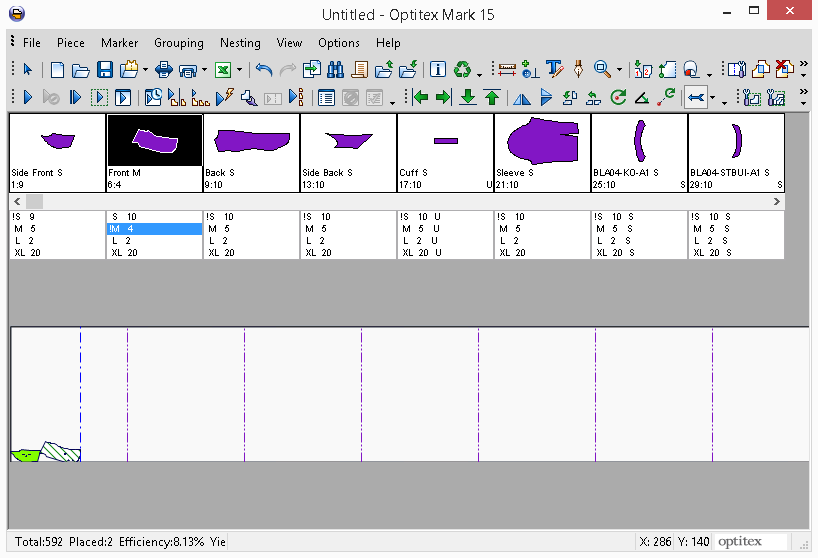
From the Pieces window, select a piece and then double-click to add the piece to the Marker. By default the smallest size of the pattern is added.
-
If you want to choose a specific size, from the Sizes Bar, click on the size name or number you require. For example, select M, then double-click to add it to the marker.
-
Repeat the same for all the pieces you are placing.
If no more pieces remain for that size, a 0 appears alongside the size and you will not be able to load any more pieces to the marker. This is to ensure that you do not place unnecessary pieces on the table.

Note: If you choose to use this way of placing pieces, keep in mind that you can only place pieces that exist in the Pieces Bar.
-
If you want to choose the location of specific pieces, you can select a size or piece from the piece/size list and then click on the marker table. This allows you to place a piece in a specific area. This is useful when you want to fit small pieces into unused areas in the marker.

Note: If the piece is too large, it can create overlaps.
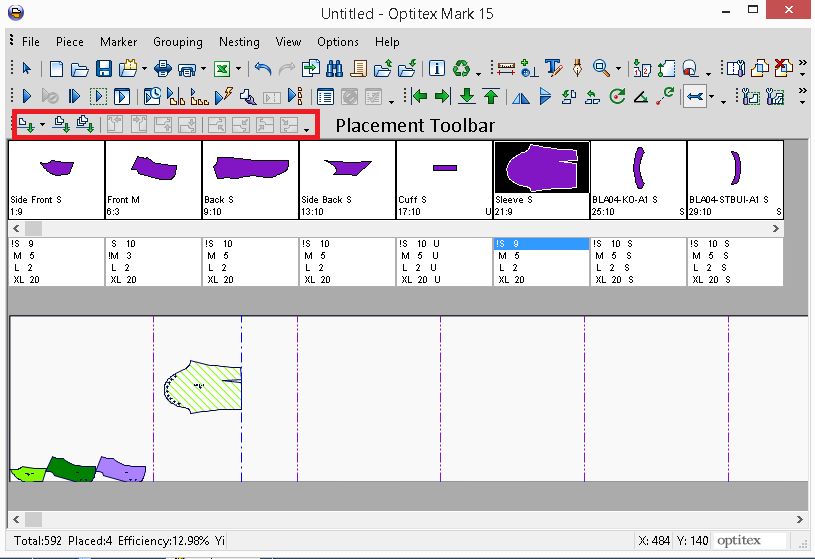
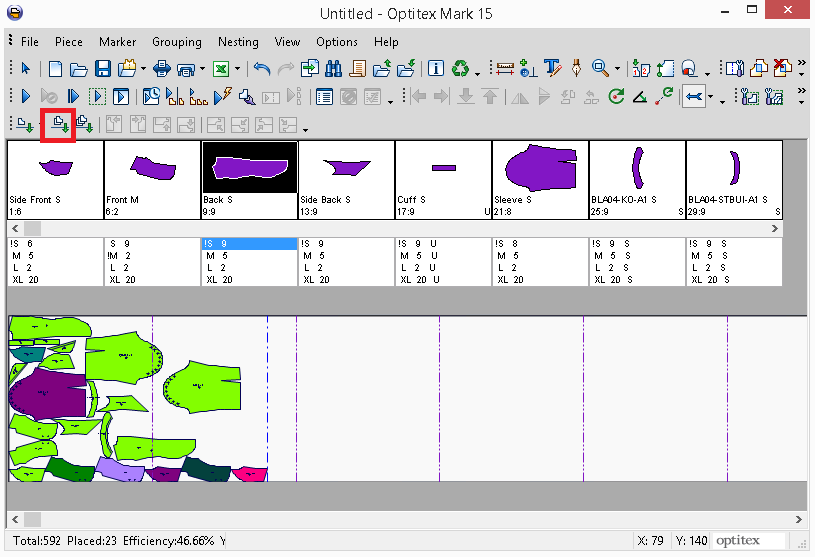
Another way of placing pieces is via the placement toolbar:
-
Place Tool:Select the piece or the pieces that you are placing on the table and click on the Place Tool.
-
To select more than one piece or size, hold down the Ctrl key while clicking the size names.
Note: Using the Place Tool command will place pieces on the marker even if there are no more pieces left.
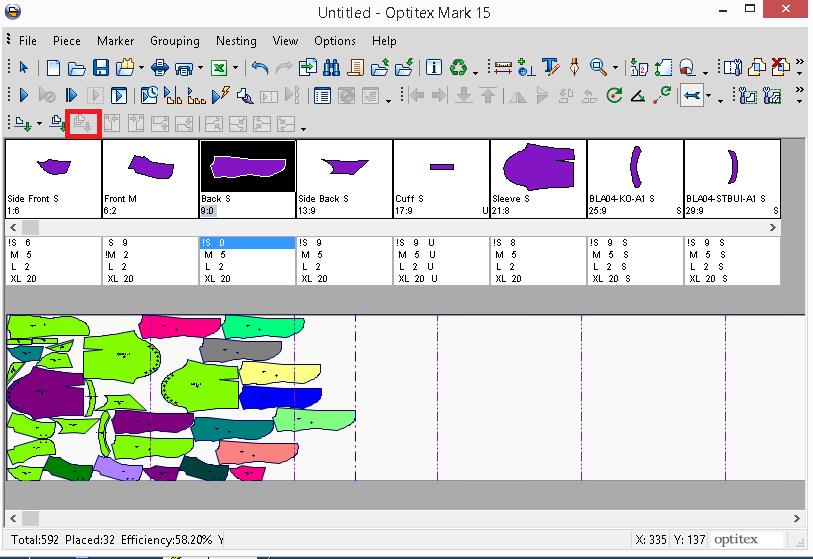
-
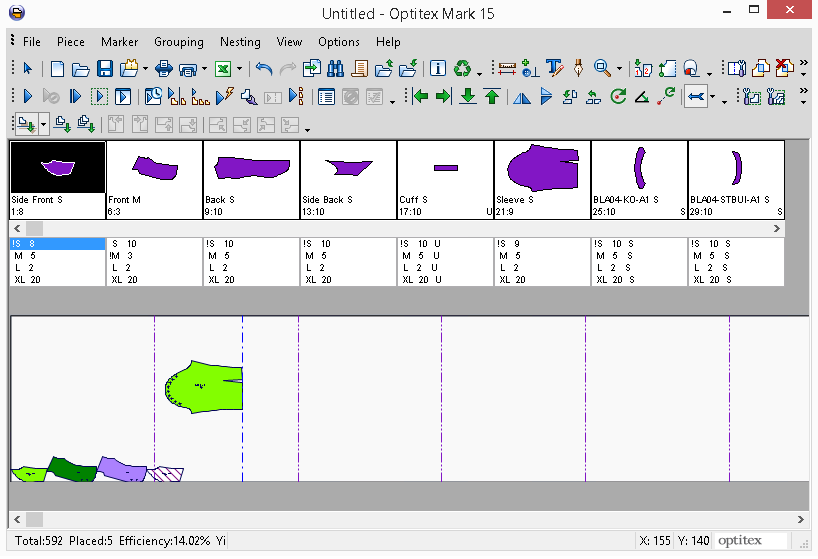
Place Selected Bundles:This option places all the pieces of the same size. This can be useful when you need to nest and cut each size separately.
-
Place All: This option places all the pieces on the table at once and does not leave extra pieces on the Piece Bar.If you want to move the pieces along the marker table: Left-click on the pattern and hold the mouse key down. Note the mouse cursor has changed its shape to a hand. Continue to hold down the mouse key and move your mouse. The pattern piece moves together with the mouse. Release the key when the piece reaches the desired location.
-
Rotating and flipping pieces: Right-click on the piece to rotate or flip it. The piece will rotate and flip based on the piece properties. For example - A piece that set to 2-way On Marker Rotation will be rotated 180 degrees when clicking on the right click.”
-
Shootingpieces to the Left- Use the right mouse button to quickly move pieces to an empty area on the marker. Right-click on the piece you wish to move. Without releasing the mouse key, move the mouse in the direction that you want the piece to move. Note the line that marks the direction in which the piece will shoot. Release the mouse key - the piece moves in the desired direction until it bumps into the nearest piece. The piece will not rotate or flip.
-
Adjust piece into hole. Click on the Insert To Hole Tool to select this working mode. Right-click on the piece you want to move and hold down the mouse key. Move the cursor to the new location in which the piece needs to be placed. If the piece fits into an empty area between the pieces - the piece will move there. In other cases - the piece will move in this general direction.
You can also use your keyboard to move around the marker. Use the keypad of your keyboard (withNum Lockon) to move the selected piece on the table. This is very useful when you want to move a piece slightly.
-
If you want to remove a piece from the marker table, double click on it. To clear all the pieces from the marker press CTRL+C.