Edit Piece Buffer
The Edit Piece Buffer dialog allows you to define buffers around an entire piece's geometry or part of it.
The buffer can be described as a separator space added to the cutting piece geometry for various purposes.
In the Edit Piece Buffer dialog, you can select more than one piece/size, and you can apply the same buffer to all sizes or selected sizes of the same piece or all pieces.
The Edit Piece Buffer dialog contains a preview window which allows you to see the changes you are making, on the fly.
You can make all your changes and check them using the preview - and then apply them. You can also zoom in or out, using your mouse wheel.
Icon & Location
-

-
Marker Menu: Piece > Edit Piece Buffer
To edit a piece's buffer:
Select a piece (either from the Pieces window, or if pieces are placed on the table, select a piece on the table.)
On
the Marker menu, go to Piece >Edit
Piece Buffer. The Edit Piece Buffer
dialog appears:
Under Sizes, select a size from (multi selection is allowed).
Note: You can choose from one of the following geometry selection options - Closed Contour, Sides Selection, Chain Selection, or Buffer.
Under Closed Contour:
the
Around option ![]() lets
you automatically set the buffer which surrounds the piece.
lets
you automatically set the buffer which surrounds the piece.
The
Convex option  lets you do the same;
however with this option, when concave areas are detected, they are straightened
out.
lets you do the same;
however with this option, when concave areas are detected, they are straightened
out.
Under Sides Selection youhave an advanced algorithm for automatically determining the top, bottom, left, or right parts of the piece.
When a certain Side Selection option is chosen, the corresponding side/part(s) of the piece is determined.
Once the side of the piece is automatically determined, the buffer is applied to it.
You can select any combination of sides to apply the buffer.
Note: When you select the Closed Contour
or Sides Selection options, the previously selected geometry is substituted
with a new geometry selected according to the chosen option.
Under Chain Selection:
-
The One by One option
 lets you select specific piece segments, one by one, which can then
be used for buffer generation. You can deselect a segment clicking
it again.
lets you select specific piece segments, one by one, which can then
be used for buffer generation. You can deselect a segment clicking
it again. -
The Start-End option
 lets you select a continuous chain of segments by selecting
the first and last segments of the chain.
lets you select a continuous chain of segments by selecting
the first and last segments of the chain. -
Once the first and last segments are selected, all the interim segments are automatically included in a clockwise direction.
-
The selection is then used to generate the buffer.
-
You can select several chains on the same piece.
Note:
When one of the Chain Selection
options is chosen, the previously selected geometry is deselected, allowing
you to re-select necessary segments.
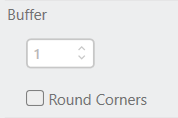
Under Buffer, you should specify the size of the buffer that you want to apply to the selected piece.
-
Select Round Corners if you want to round the sharp corners of the buffered border.
-
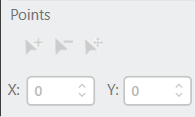
The Points options are available only after applying the buffer. You can modify the buffer's contour by:
-
Adding a new control points to it.
-
Moving points.
-
Deleting/removing points.
-
The X/Y options allow you to define the position of the buffer's control points.
-
Apply Options:
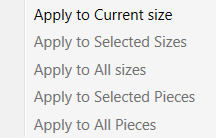
The Apply drop-down list provides the following options:
-
Apply to Current Size to apply the buffer modification changes to the currently selected size of the currently selected piece.
-
This option is the default when the Apply button is clicked.
-
Apply to Selected Sizes to apply the buffer modification specified to the currently selected size to other selected sizes.
-
The Apply to Selected Sizes option is enabled only when the buffer geometry is created using Closed Contour or Sides Selection.
-
This option is enabled when multiple sizes are selected. When a single size is selected, this option is disabled.
-
This is also disabled when the actual previewed buffer geometry (to be applied) is created using the Chain Selection options;
-
It is also disabled when the current action (to be applied) is Add/Remove/Move Points.
-
Apply to All Sizes to apply the buffer modification changes to all sizes of the currently selected piece.
-
The Apply to all Sizes option is enabled only when the buffer geometry is created using Closed Contour or Sides Selection.
-
This option is disabled when the actual previewed buffer geometry (to be applied) is created using the Chain Selection.
-
The Apply to All Sizes option is disabled when the current action (to be applied) is Add/Remove/Move Points.
-
Apply to Selected Pieces to apply the actual buffer modification to all sizes of all selected pieces.
-
Apply to Selected Pieces is enabled only when the buffer geometry is created using Closed Contour or Sides Selection.
-
This option is enabled when multiple pieces are selected.
-
When a single piece is selected, the Apply to Selected Pieces option is disabled.
-
This is also disabled when the actual previewed buffer geometry (to be applied) is created using Chain Selection.
-
It is also disabled when the current action (to be applied) is Add/Remove/Move Points.
-
Apply to All Pieces to apply the actual buffer modification to all sizes of all pieces available in the current Marker file.
-
The Apply to All Pieces option is enabled only when the buffer geometry is created using Closed Contour or Sides Selection.
-
This option is disabled when the actual previewed buffer geometry (to be applied) is created using Chain Selection.
-
The Apply to All Pieces option is also disabled when the current action (to be applied) is Add/Remove/Move Points.
-
Once the buffer is applied to the geometry, the next buffer definition session automatically starts allowing you to:
-
Re-define the buffer for those segments where the buffer was previously applied.
-
Define a new buffer for those segments where buffer is not available.
-
When during a buffer definition session you select a segment (or segments) for which the buffer is already specified, the buffer geometry for these segments will be removed and substituted with the new one.
-
When during the a buffer definition session you select a segment (or segments) for which the buffer is not applied, a new buffer geometry will be generated for the segments.
-
The buffer geometry for segments that are not selected during the current session remains unchanged
Within a single buffer definition session (which is concluded by the Apply button) you could use different geometry selection options.
However, the buffer value is common for all geometry segments selected within the current session.
This way, combining different geometry selection and different buffer values defined through several sessions, you could obtain the composite buffer geometry of any configuration.
Example:
Obtaining a composite buffer geometry of different configurations
-
Choose Up option under Sides Selection
-
Set the buffer value to 2.
-
Click the Apply button. The buffer geometry is created for the upper segment.
-
Choose Chain Selection and select all left segments of the piece.
-
Set the buffer value to 1.
-
Click the Apply button:
-
The new buffer geometry is generated for the left segments.
-
The previously defined buffer remains unchanged.
-
Select Right and Up under Sides Selection.
-
Set the buffer value to 3.
-
Click the Apply button:
-
The new buffer geometry is generated for the right and upper segments
-
The previous upper segment buffer is substituted by a new one.
-
The left segments buffer remains unchanged.
Remove Options
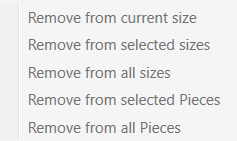
The Remove drop-down list provides you with the following options for removing the buffer geometry from the current piece/size.
-
Select Remove from Current Size to remove the buffer applied to current size of the currently selected piece.
-
Select Remove from Selected Sizes to remove the buffer applied to selected sizes of the currently selected piece.
-
Select Remove from All Sizes to remove the buffer applied to all sizes of the currently selected piece.
-
Select Remove from Selected Pieces to remove the buffer geometry from all sizes of selected pieces.
-
Select Remove from All Pieces to remove the buffer geometry from all sizes of all pieces.
-
Click Close to close the dialog.