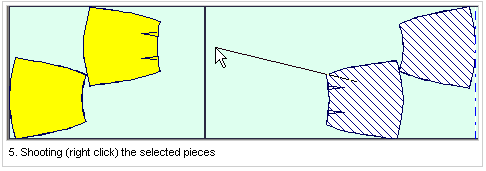
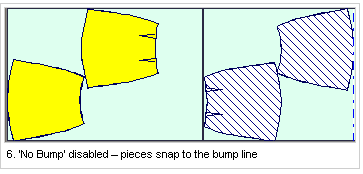
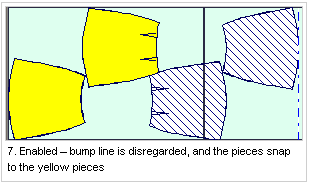
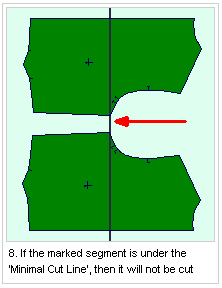
Bump/ Cut Lines
You can use bump/cut lines when you want to separate areas on the marker, and create cut lines. By default, the Adjust Tool can also snap ('bump') pieces to bump lines.
Location
-
Menu: Marker> Bump/ Cut Lines
-
Using the Select Tool, over the Marker's boundary – drag a bump line.
-
Right click menu.
To create Bump/ Cut Lines:
From the main menu,
go to Marker > Bump/Cut Lines.
The Bump/Cut Lines dialog appears: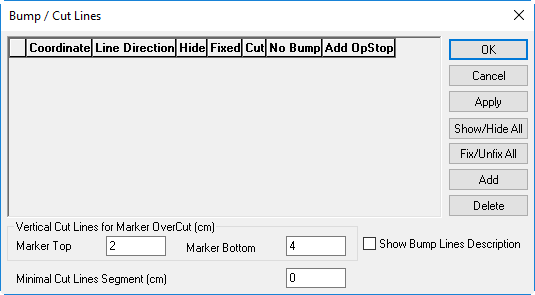
If bump/cut lines are already defined, the table appears with the following
information:
|
Column |
Description |
|
Coordinate |
Displays the bump line's position along the X & Y Axis. |
|
Line Direction |
Displays the bump line's direction: horizontal or vertical. |
|
Hide |
If selected, the bump line is hidden but isn't deleted. This can be used when many bump lines are present and you want to just hide it. |
|
Fixed |
If selected, the bump line has a fixed position. |
|
Cut |
If selected, the bump line will become a cut line, and will be cut in a cutting machine. |
|
No Bump |
If selected, the bump line is shown, but disregarded by the system when placing pieces, shooting or nesting.
|
|
Add OpStop |
If selected, an OpStop command is added when cutting and the machine will stop before cutting the bump line. |
|
Vertical Cut Lines for Marker OverCut (cm) |
This allows you to set cutting lines
that will be cut by a cutting machine outside of the marker boundaries.
This option is used when several plies are laid, and you want
to cut all the plies accurately (the last ply can be a bit shifted
compared to the first ply) |
|
Marker Top |
Enter the overcut for the top of the Marker |
|
Marker Bottom |
Enter the overcut for the bottom of the Marker. |
|
Show Bump Lines Description |
If selected, a description is displayed on the bump line (shows the total length):
|
|
Minimal Cut Line Segment |
Sets the minimal length of a cut line that will actually be cut by the cutting machine. This option is used when a cut line goes between to pieces that are placed next to each other.
|
Click Show/Hide All, if you want to show or hide all the bump lines in your Marker.
Click Fix/Unfix All, if you want to make all bump lines with a fixed/unfixed position.
Click Add, if you want to add a new bump line. You can also drag a bump line from the boundaries (top, bottom, left, right) of the Marker using the Select Tool.
Click Delete,
if you want to delete a selected bump line from the dialog.
Once you create bump lines, you can use the right mouse button menu to
perform extra actions: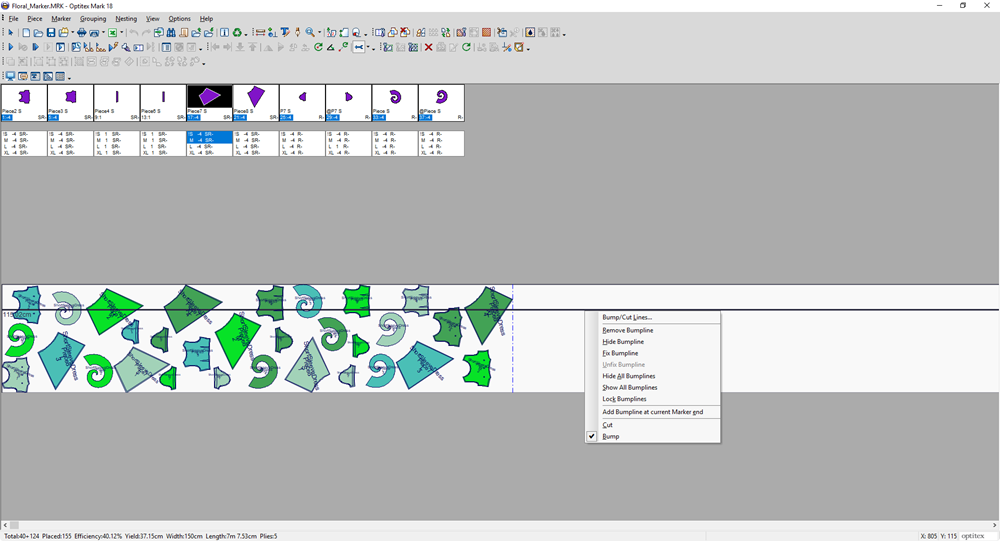
Bump/Cut Lines: Click to open the Bump/Cut Line dialog.
Remove Bumpline: Deletes the selected bump line.
Hide Bumpline: Hides the bump line, but does not delete it.
Fix Bumpline: Fixes the location of the bum line so it cannot be moved.
Unfix Bumpline: If the bump line's location is fixed, unfixes it.
Hide All Bumplines: Hides all the available bump lines.
Show All Bumplines: Shows all hidden bump lines.
Lock Bumplines: Locks the bump line in the location on the Marker. This is different from "Fix" as it locks both the position and display.
Add Bumpline at Current Marker End: Adds a bump line at the end of the marker. Can be used with "nesting select pieces" to divided your marker nesting according to sizes or styles.
Cut: Converts the bump line into a cut line.
Bump: Converts a cut line into a bump line.
