Configuring Kuris CUTTY 3521Z cutter with Optitex Marker using Stripes Matching
Kuris model CUTTY 3521Z has a special camera that scans the fabric (material) as an additional verification to the nesting with matching done in Optitex Marker.
The cut file is generated from Marker and sent to the Kuris Software where it is processed to be cut.
The process includes:
• Applying internal parameters and stripes matching settings in Marker
• Generating the cut file using the appropriate configuration.
To configure Marker with Kuris CUTTY 3521Z cutter
1. On the Marker menu go to Piece > Internals > Global Internal Parameters...
The Global Change Internal Parameters dialog opens.
2. Apply the following Parameters:
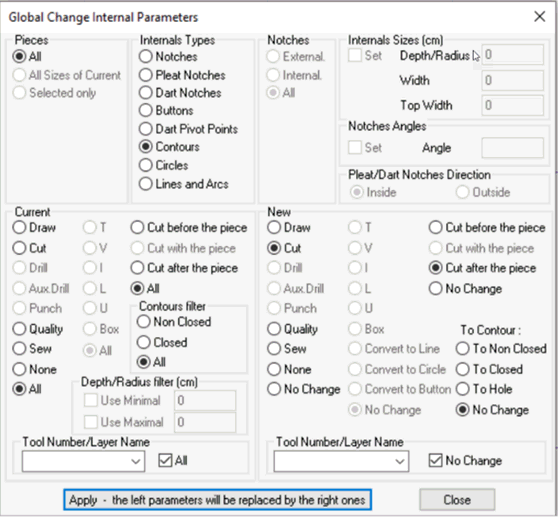
3. On the Marker menu go to Piece > Internals > Internals. The Internals dialog opens.
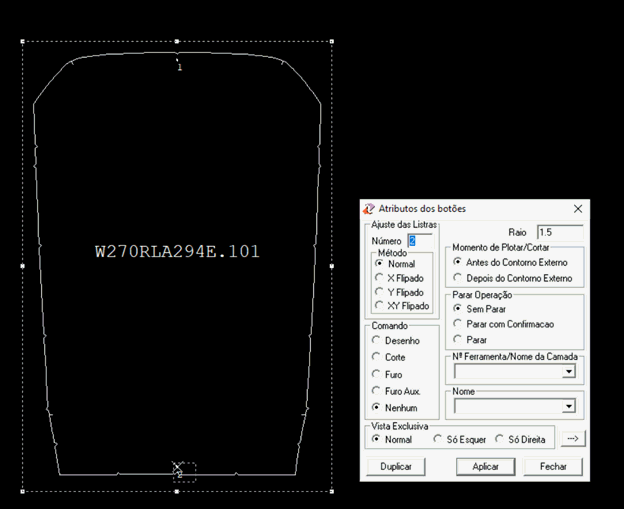
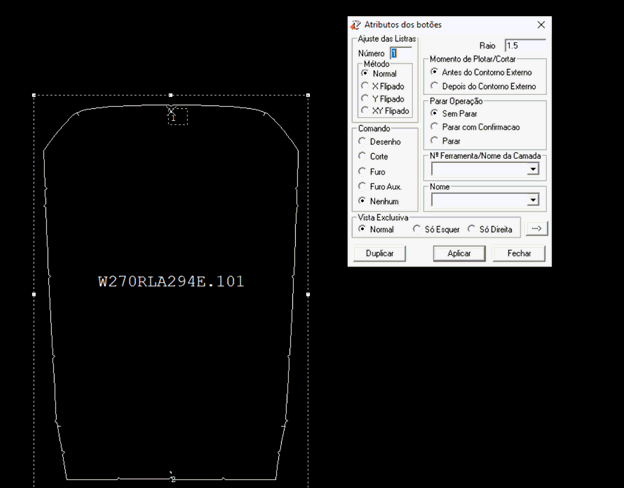
4. Apply the settings to Internal Buttons with Stripe Adjust Number as needed:
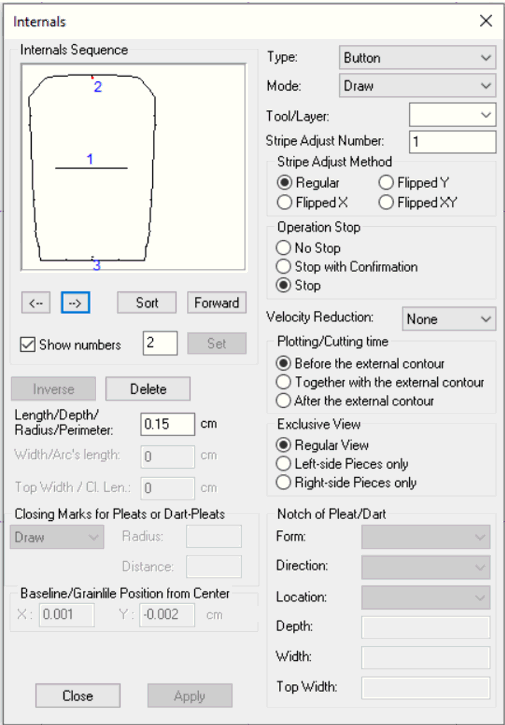
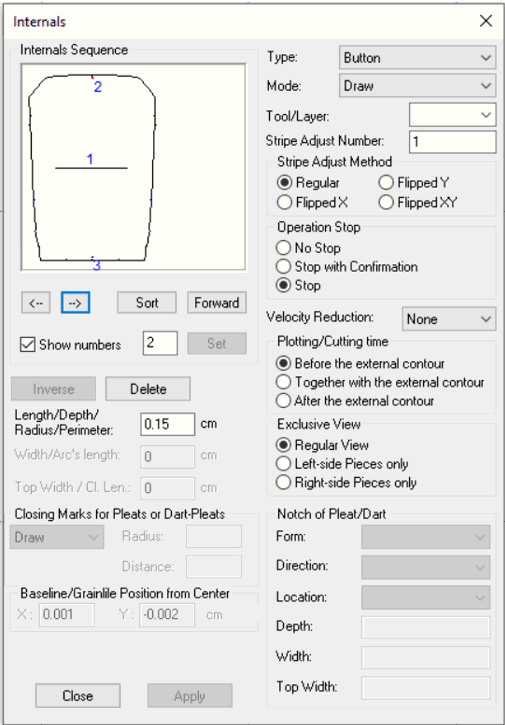
5. On the Marker menu go to Marker > Fabric and Stripes > Relate Piece to Stripes…
6. Configure Relate Piece to Stripes as needed:
7. In Marker go to File > Plot and configure it as illustrated:
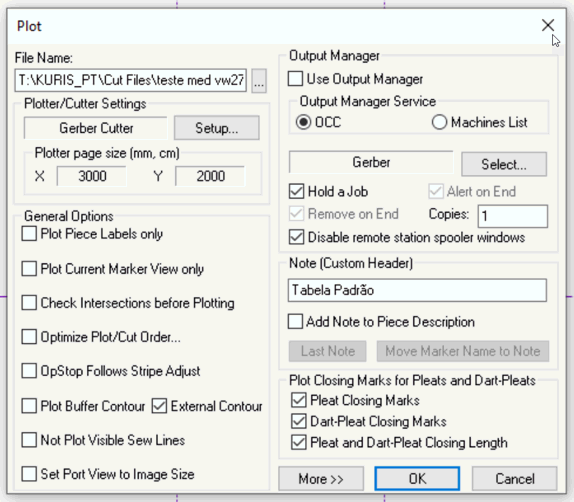
8. Click Setup.
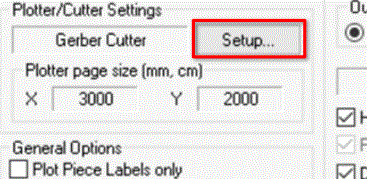
The Plotter/cutter Setup dialog opens.
9. Select the General tab. Use the following settings:
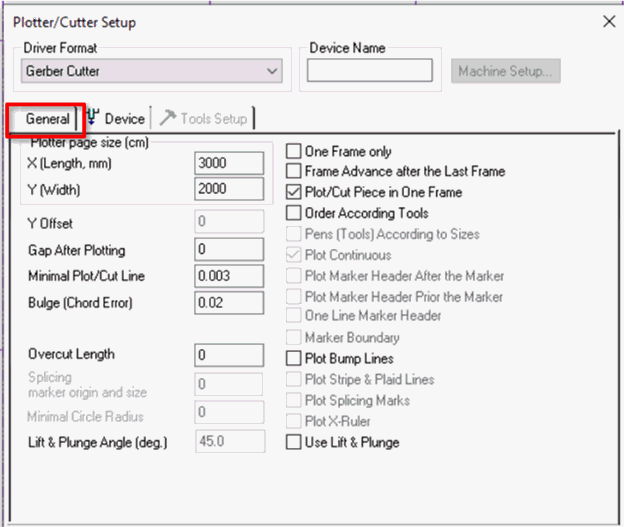
10. Select the Device tab and use these settings:
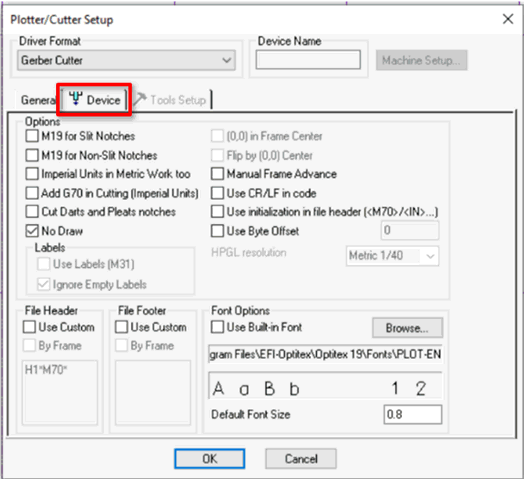
11. Click Ok > Ok to generate and save the cut file .
12. The GBR file is created and is further processed in Kuris Software. The following is an example:
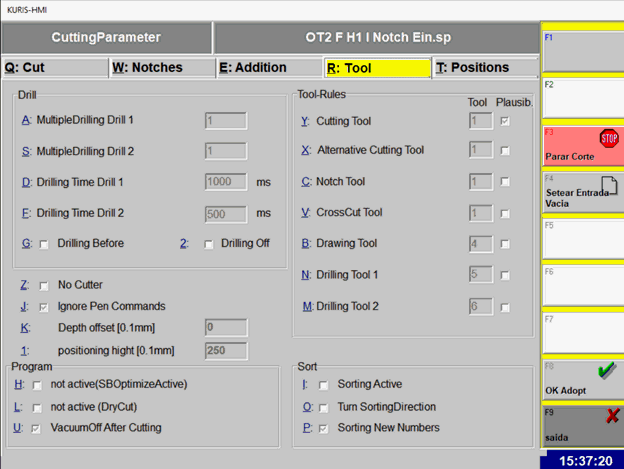
 See also: Optitex Supported Cutters