Preparing and Exporting a 3DDI Package
Before you can start working with your 3D sample in 3DDI, you must first prepare your 3D sample. This is done in the PDS.
To prepare your 3D sample:
-
We recommend that you name your pattern pieces so they can be accurately identified throughout the process.
Pair pieces options: You can export pair pieces as a single piece (you will be able to apply the same design on paired pieces in 3D Design for Illustrator) or as pair pieces (you will be able to apply a different design for each piece) Note: All pair pieces should be paired and not with a quantity of 2.
Single piece:-
Orientationunder Marker Attributes in the Piece Properties should be Undefined
Pair pieces:-
Orientation under Marker Attributes in the Piece Properties should be Left or right, depending on the pattern.
-
Oposite Piece under Marker Attributes in the Piece Properties should be UP/Down (default)
-
-
Simulate your garment.

-
Once a 3D sample is created in PDS, click on the Export 3DDI icon
 located in the Shader Manager panel.
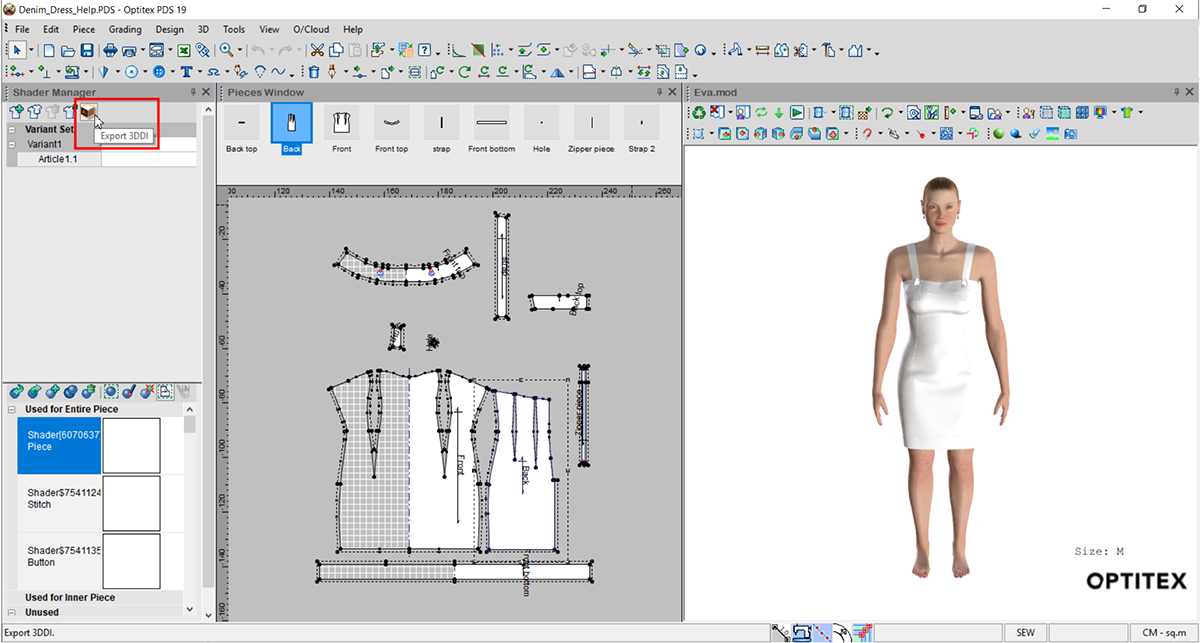
-
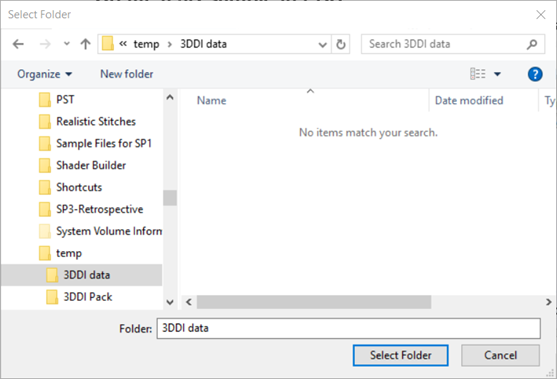
Select the directory where you want to save the 3DDI package.
Once the directory is selected, the application will automatically create all 2D and 3D data required for the 3DDI plugin: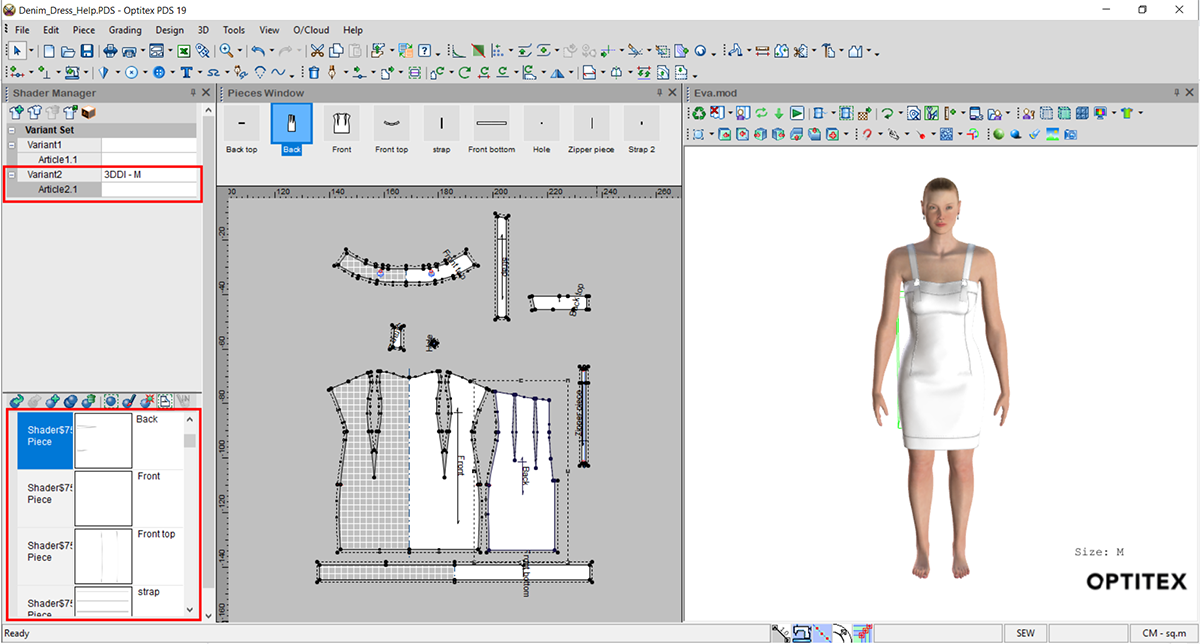
-
If one of the pieces has Shader Attributes in 3D Properties defined, you will receive a warning message as follows:
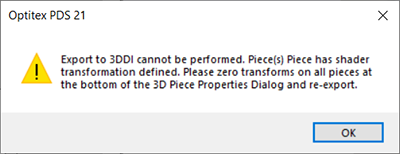
Reset the Shader Attribute transformations and then export your 3DDI package. -
If one of the pieces is a map zone and one of the zone names has a prefix "3D", you will receive a warning message as follows:
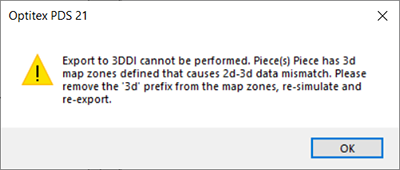
Remove/change the prefix, re-simulate your pattern and then export your 3DDI package. -
Now you can save the PDS+3D file, which also contains a new variant, article and shaders + texture that are created automatically during the 3DDI package creation process.
Note:The pattern size you are simulated in PDS application and then exported to 3DDI package is the size that you need to work on it in Adobe Illustrator and 3DDI plugin.
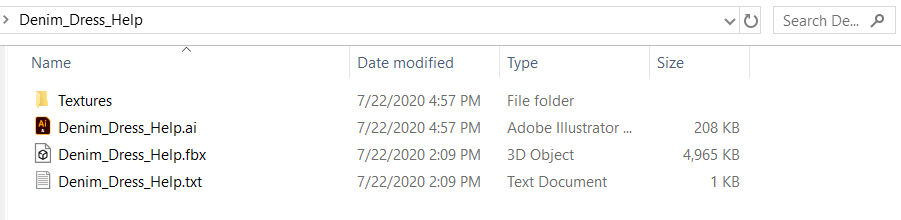
![]() Click here
to see which files are created in 3DDI package.
Click here
to see which files are created in 3DDI package.